Building rich text editors has always been an important part of web development. But traditional editors only allow formatting text, inserting images, or making lists.
But what if I told you, you can build your own editor that also helps you generate content, suggest improvements in real time, and even check how good your writing is?
One way to do this is by using tools like Froala, a powerful WYSIWYG editor that’s easy to integrate with React and supports AI-powered features.
In this guide, we’ll build an AI-powered HTML editor in React with smart content suggestions and advanced features like automated text generation and EEAT (Experience, Expertise, Authoritativeness, Trustworthiness) analysis.
Key Takeaways
- AI makes editors smarter and more interactive.
- Real-time suggestions help you write faster and better.
- Connecting to a backend lets the AI create content dynamically.
- Beginners can learn full-stack skills like React, Node, and working with APIs.
Why Build an AI-Powered HTML Editor?
Traditional WYSIWYG editors do let you format text, but they don’t help you while writing. With AI:
- You can generate content automatically based on prompts.
- Get real-time suggestions to make your writing better.
- Ensure your content meets quality and SEO guidelines.
Using AI with React, Node, and Froala makes the editor flexible and easy to expand, and beginners can learn practical full-stack skills along the way.
Now enough talking, let’s start building it!
Getting Started: Building the AI-Powered HTML Editor
We’ll use:
- React + Vite for frontend
- Node + Express for backend
- Hugging Face API for AI
Let’s start by creating a folder for our project to keep all files organized and easy to manage:
mkdir react-froala-html-editor
Next, we move into the project folder so that all subsequent commands, like installing dependencies, happen inside this folder:
cd react-froala-html-editor
Frontend Setup
Step 1: Initialize a React Vite Project
We need a React app to run our editor. Using Vite makes the setup fast and simple.
npm create vite@latest ai-froala-editor -- --template react
Move into the frontend project folder:
cd ai-froala-editor
Install all necessary dependencies for the React app:
npm install
This sets up our frontend project with a minimal React structure.
Step 2: Install Froala Editor
Install Froala, the WYSIWYG editor, and the React wrapper so we can create a rich text editor:
npm install react-froala-wysiwyg froala-editor
This lets you add toolbar buttons, format text, and later include AI features.
Step 3: Create a Basic Editor Component
Create src/AIEditor.jsx:
import React from "react";
import FroalaEditorComponent from "react-froala-wysiwyg";
import "froala-editor/css/froala_style.min.css";
import "froala-editor/css/froala_editor.pkgd.min.css";

const AIEditor = () => {
return (
<div>
  <FroalaEditorComponent tag="div" />
</div>
  );
};

export default AIEditor;
This renders a basic editor in your React app.
Step 4: Update App.jsx
import React from "react";
import AIEditor from "./AIEditor";

function App() {
return (
<div className="App">
  <h1>AI-Powered Froala Editor</h1>
  <AIEditor />
</div>
  );
}

export default App;
Run the frontend:
npm run dev
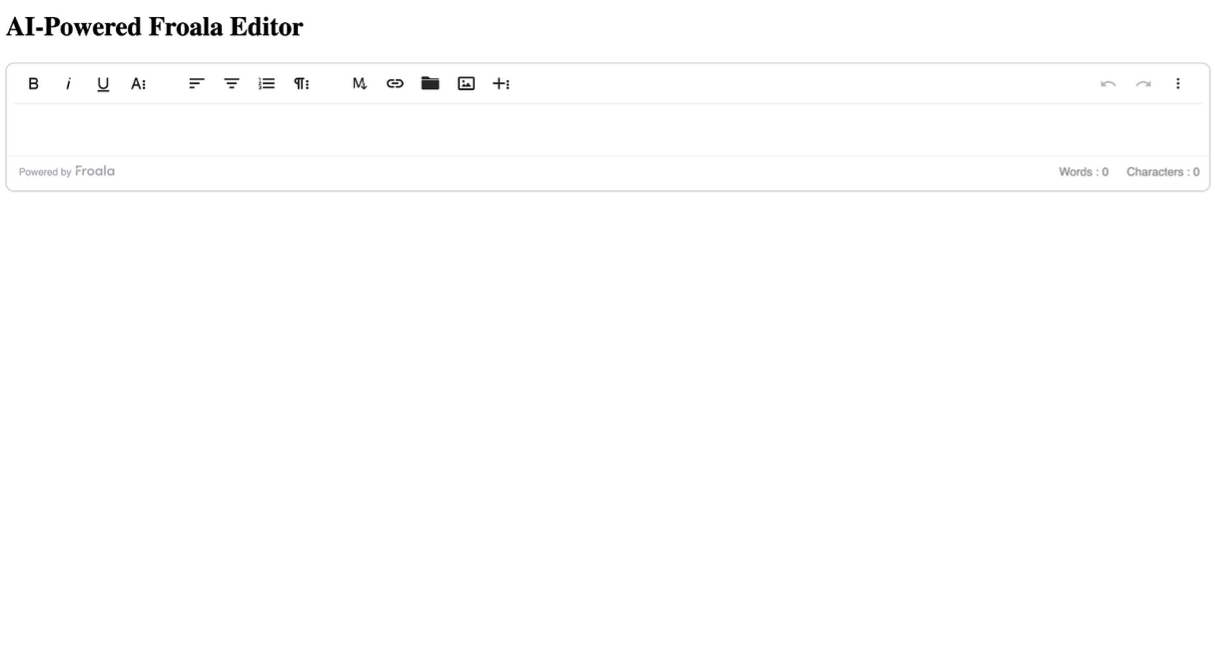
Open the URL Vite provides. You should see a simple editor.

Step 5: Add Custom AI Button
Next, we’ll add a toolbar button that lets the AI generate content.
import FroalaEditor from 'froala-editor';
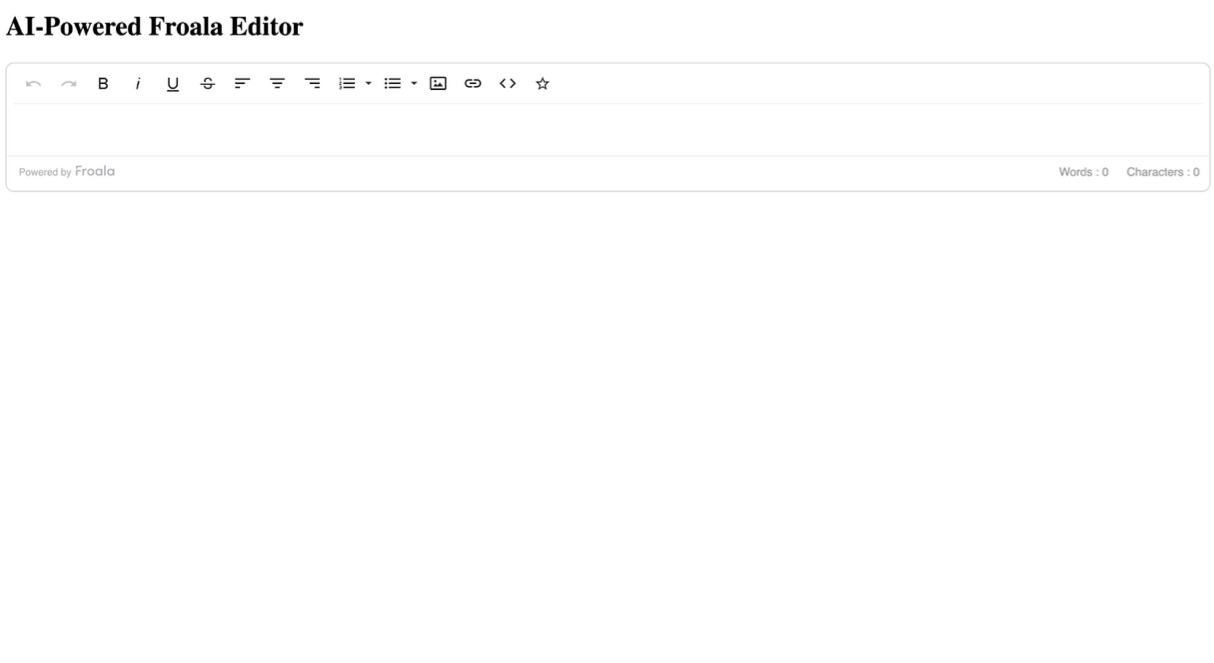
Then, in our component, adding this config adds toolbar buttons, including a custom AI button for generating content:
const config = {
  toolbarButtons: [
    "undo",
    "redo",
    "bold",
    "italic",
    "underline",
    "strikeThrough",
    "alignLeft",
    "alignCenter",
    "alignRight",
    "formatOL",
    "formatUL",
    "insertImage",
    "insertLink",
    "html",
    "ai",
  ],
  events: {
    initialized: function () {
      FroalaEditor.DefineIcon("ai", { NAME: "magic", SVG_KEY: "star" });
      FroalaEditor.RegisterCommand("ai", {
        title: "Generate with AI",
        focus: true,
        undo: true,
        refreshAfterCallback: true,
        callback: () => {
          console.log("AI button clicked");
        },
      });
    },
  },
};
Pass this config to the editor:
<FroalaEditorComponent tag="div" config={config} />
At this point, clicking the star icon button logs a message.

Now, let’s make a backend that does something when we click the “Generate AI” button.
Backend Setup
Step 1: Create a Backend Folder
Create a separate folder for backend code to keep frontend and backend separate:
mkdir backend
Move into the backend folder:
cd backend
Step 2: Initialize Node Project
Initialize a Node.js project and generate package.json:
npm init -y
Step 3: Install Dependencies
npm install express cors dotenv
Why these packages:
- express: create a server
- cors: allow frontend to talk to backend
- dotenv: safely store your Hugging Face API token
Step 4: Create .env File
Inside backend, create a file called .env:
HUGGINGFACE_TOKEN=your_hugging_face_token_here
PORT=3000
⚠️Important: Never share this token publicly or commit it to GitHub.
Step 5: Create server.js
Create server.js in the backend folder:
const express = require("express");
const cors = require("cors");
const dotenv = require("dotenv");

dotenv.config();

const app = express();

app.use(cors());
app.use(express.json());

const HUGGING_FACE_TOKEN = process.env.HUGGINGFACE_TOKEN;

app.post("/generate", async (req, res) => {
const { prompt } = req.body;
if (!prompt) return res.status(400).json({ error: "Prompt is required" });

try {
const response = await fetch("https://router.huggingface.co/v1/chat/completions", {
  method: "POST",
  headers: {
    Authorization: `Bearer ${HUGGING_FACE_TOKEN}`,
    "Content-Type": "application/json",
  },
  body: JSON.stringify({
    model: "deepseek-ai/DeepSeek-V3-0324",
    messages: [{ role: "user", content: prompt }],
    max_tokens: 100,
  }),
});

const text = await response.text();
if (!response.ok) return res.status(response.status).send(text);

const data = JSON.parse(text);
const generatedText = data.choices?.[0]?.message?.content || "No response";

res.json({ generatedText });
} catch (err) {
res.status(500).json({ error: err.message });
}
});

const PORT = process.env.PORT || 3000;
app.listen(PORT, () => console.log(`Server running on port ${PORT}`));
Step 6: Run the Backend
Start the backend server to handle requests from the frontend:
node server.js
Our backend is ready at http://localhost:3000/generate
Next, we’ll connect the frontend to this backend.
Connecting Frontend and Backend
Update AIEditor.jsx:
Update AIEditor.jsx with fetch request logic and event handlers to send prompts to backend and update content dynamically.
  import { useRef } from "react";

  const editorRef = useRef(null);

  const generateWithAI = async () => {
    try {
      const editor = editorRef.current.editor; // Froala editor instance
      const prompt = editor.html.get(); // get current editor content

      // Call backend
      const res = await fetch("http://localhost:3000/generate", {
        method: "POST",
        headers: { "Content-Type": "application/json" },
        body: JSON.stringify({ prompt }),
      });

      const data = await res.json();

      // Replace editor content with AI-generated text
      if (data.generatedText) {
        editor.html.set(data.generatedText);
      } else {
        alert("No text generated");
      }
    } catch (err) {
      console.error("Error generating AI text:", err);
    }
  };
Update the toolbar callback:
callback: generateWithAI
And pass ref to FroalaEditorComponent:
<FroalaEditorComponent tag="div" config={config} ref={editorRef} />{" "}
Now, open the frontend in the browser, and make sure the backend and frontend are running. Type a prompt, and click the star button to generate AI content.
Adding Smart Content Suggestions & EEAT Rating
At this point, our AI button generates text and replaces the content in the editor. That’s great, but let’s go further:
- Suggest improvements instead of just replacing content.
- Add an EEAT (Experience, Expertise, Authoritativeness, Trustworthiness) check, following Google’s helpful content guidelines.
Adding Smart Content Suggestions to Our Editor
Update AIEditor.jsx with:
//  Update Imports
import React, { useRef, useState, useCallback } from "react";

// State for suggestions
 const [isGenerating, setIsGenerating] = useState(false);
  const [suggestions, setSuggestions] = useState([]);
  const [showSuggestions, setShowSuggestions] = useState(false);
  const [currentText, setCurrentText] = useState("");

  // Function to get suggestions
  const getContentSuggestions = async (text) => {
    if (!text || text.length < 10) {
      setSuggestions([]);
      setShowSuggestions(false);
      return;
    }

    try {
      const res = await fetch("http://localhost:3000/suggest", {
        method: "POST",
        headers: { "Content-Type": "application/json" },
        body: JSON.stringify({ content: text }),
      });

      const data = await res.json();

      if (data.suggestions && data.suggestions.length > 0) {
        setSuggestions(data.suggestions);
        setShowSuggestions(true);
      }
    } catch (err) {
      console.error("Error getting suggestions:", err);
    }
  };

// Debounced function to avoid too many API calls
  const debouncedGetSuggestions = useCallback(
    debounce((text) => getContentSuggestions(text), 2000),
    []
  );

// Function to apply a suggestion
  const applySuggestion = (suggestion) => {
    const editor = editorRef.current.editor;
    const currentContent = editor.html.get();

    // Insert suggestion at cursor position or append to current content
    if (currentContent.trim()) {
      editor.html.set(currentContent + " " + suggestion);
    } else {
      editor.html.set(suggestion);
    }

    setShowSuggestions(false);
    setSuggestions([]);

    // Focus back to the editor
    editor.events.focus();
  };

// Handle content changes
  const handleModelChange = (content) => {
    setCurrentText(content);
    // Get suggestions when user stops typing
    debouncedGetSuggestions(content);
  };

  // Debounce utility function
function debounce(func, delay) {
  let timeoutId;
  return function (...args) {
    clearTimeout(timeoutId);
    timeoutId = setTimeout(() => func.apply(this, args), delay);
  };
}
Render suggestions: Displays real-time suggestions to the user and allows them to apply improvements to the editor content.
// Update the return statement return (); };{isGenerating && ( Generating content with AI...)} {showSuggestions && suggestions.length > 0 && ()}Suggestions{suggestions.map((suggestion, index) => (applySuggestion(suggestion)} style={{ padding: "6px 8px", borderBottom: index < suggestions.length - 1 ? "1px solid #eee" : "none", cursor: "pointer", fontSize: "16px", }} > {suggestion}))}
Backend Suggestions Endpoint:
Add this in backend/server.js:
// Endpoint to get content suggestions
app.post("/suggest", async (req, res) => {
  const { content } = req.body;

  if (!content || content.length < 10) {
    return res.json({ suggestions: [] });
  }

  try {
    const response = await fetch(
      "https://router.huggingface.co/v1/chat/completions",
      {
// Endpoint to get content suggestions
app.post("/suggest", async (req, res) => {
  const { content } = req.body;

  if (!content || content.length < 10) {
    return res.json({ suggestions: [] });
  }

  try {
    const response = await fetch(
      "https://router.huggingface.co/v1/chat/completions",
      {
    const text = await response.text();

    if (!response.ok) {
      console.error("Hugging Face API error:", text);
      return res.json({ suggestions: [] });
    }

    const data = JSON.parse(text);
    const suggestionsText = data.choices?.[0]?.message?.content || "[]";

    try {
      // Clean the response - sometimes AI adds extra text around JSON
      let cleanedText = suggestionsText.trim();

      // Look for JSON array pattern
      const jsonMatch = cleanedText.match(/\[.*\]/s);
      if (jsonMatch) {
        cleanedText = jsonMatch[0];
      }

      // Try to parse the JSON array of suggestions
      const suggestions = JSON.parse(cleanedText);

      // Ensure we have an array and clean up suggestions
      const cleanSuggestions = Array.isArray(suggestions)
        ? suggestions
            .slice(0, 4)
            .filter((s) => s && typeof s === "string" && s.length > 10)
        : [];

      res.json({ suggestions: cleanSuggestions });
    } catch (parseError) {
      console.error("Failed to parse suggestions:", parseError);
      console.log("Raw AI response:", suggestionsText);
    }
  } catch (err) {
    console.error("Error getting suggestions:", err.message);
    res.json({ suggestions: [] });
  }
});
Test Smart Content Suggestions:
- Start backend and frontend.
- Type content in the editor.
- Wait 2 seconds → suggestions appear.
- Click a suggestion → it gets added to the content.
Note: If you don’t see any changes, please restart your server.
Adding EEAT Guidelines to Our Editor
The EEAT feature checks the content based on Google’s helpful content guidelines.
You can find the code to update AIEditor and Server here!
In this code:
- We added an EEAT button in the toolbar (search icon).
- Clicking it sends the editor content to the backend for evaluation.
- It shows an EEAT score or suggestions to improve the content.
Test the EEAT Analysis:
Type at least 50 characters in the editor, then click the EEAT button (search icon) in the toolbar to see the analysis.
Best Practices
- Keep the frontend and backend separate for clarity.
- Store sensitive API keys in a
.envfile. - Debounce API calls to avoid too many requests.
- Test endpoints on their own before connecting them.
Conclusion
Building an AI-powered HTML editor in React is easier now with tools like Froala and a simple backend setup. Features like real-time suggestions, automatic content generation, and EEAT analysis help your editor do more than just format text; they can actually help you write better.
In this guide, we have built a useful and interactive tool. You can try it out, customize it, and see your writing and productivity improve.
Resources for Further Learning
Share this post
Leave a comment
All comments are moderated. Spammy and bot submitted comments are deleted. Please submit the comments that are helpful to others, and we'll approve your comments. A comment that includes outbound link will only be approved if the content is relevant to the topic, and has some value to our readers.

Comments (0)
No comment