WebP and PNG image formats are both designed to be used on the web. However, there are a few reasons why you may want to convert WebP to PNG. Not all editing software supports the WebP format, and preserving transparency may be another reason.
Understanding WebP Files
WebP is an image file format developed by Google, and it is well-known for its high efficiency and lossless compression. It is designed to provide both lossless and lossy compression for images on the web.
WebP File Pros
- Format flexibility
- Transparency
- Smart and lossless compression
Understanding PNG Format
The Portable Network Graphics (PNG) is the most popular file format that can replace JPEG. PNG is widely used for storing images on the web and supports lossless compression.
PNG File Pros
- It supports transparent pixels.
- They are easy to edit and share.
Despite the notable benefits of WebP file format, sometimes it is necessary to convert it to other formats for shareability and quick editing.
On the other hand, you can only realize the benefit of these conversions if you do it without tampering with the image quality.
Graphic designers, web developers, and professional photographers often face the need to convert WebP files to PNG.
There are several methods of converting WebP files to PNG; choose one that suits your speed and device compatibility needs.
Reasons for Converting WebP to PNG
Despite the WebP format’s efficiency, converting these files to PNG may be necessary, especially for digital marketers.
Here are some benefits of changing a WebP image to PNG.
1. Compatibility
PNG is highly compatible across different platforms and browsers. While some browsers like Google Chrome support WebP, many are yet to accept this format.
2. Transparency
You may find it difficult to use WebP when dealing with an image with a transparent background. However, PNG has transparency features for this purpose.
3. Exceptional Lossless Compression
PNG format is crucial for images like line drawing, text-based graphics, and all images that require you to retain image integrity. While WebP uses lossless compression, the degree cannot match PNG's.
Fastest Methods of Converting WebP to PNG Online
Online converters are among the fastest ways to change a WebP file to PNG, as long as you identify an appropriate tool compatible with your browser and device.
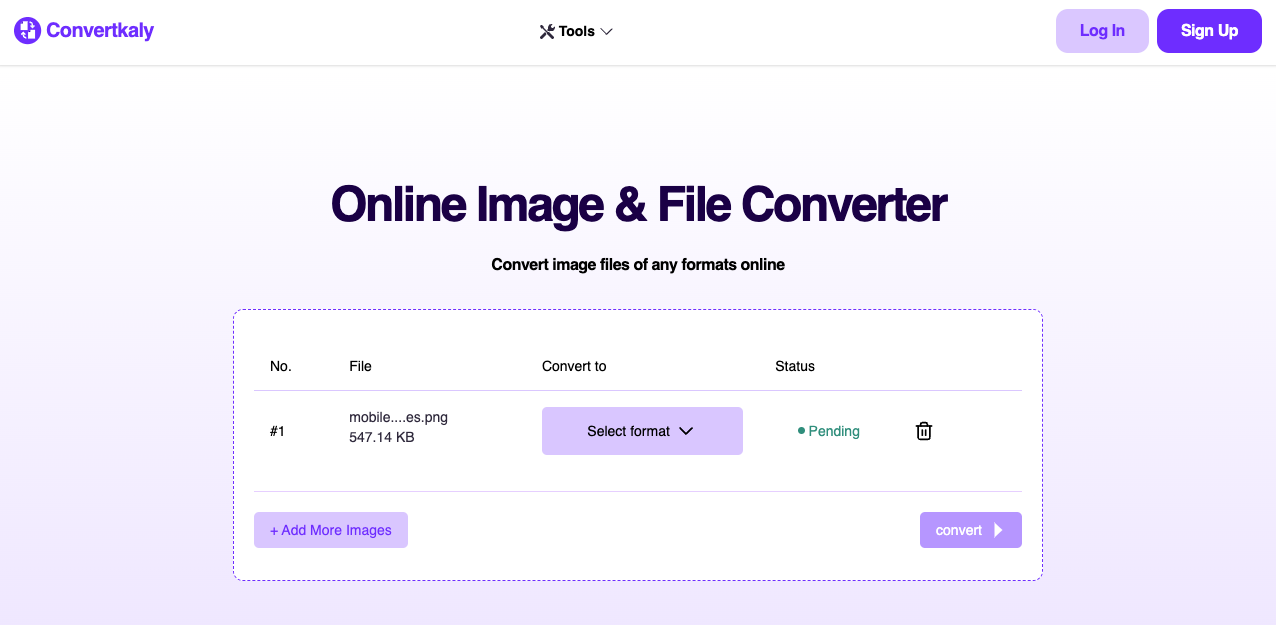
Some online converters like Convertkaly are easy to use and user-friendly and maintain your image’s quality during the conversion.
Nonetheless, one of the most notable setbacks of online converters is that they only support file sizes up to 100 MB.
With that, you can only convert one file at a time.
1. Online Converters
Many online converters use a similar approach but with slight variations.
Here are the steps for converting a WebP to PNG online using Convertkaly, but other online services provide similar interfaces.
- Open Convertkaly on your browser and proceed to the WebP to PNG conversion page.
- Click “Choose Files” to upload the WebP images you wish to convert. In addition, you can drag and drop the image in the dialogue box.
- To convert multiple images, click “Add More Images”.
- Once you upload your files, click the drop-down menu to select an output format for your conversion. Here, click “PNG”.
- When the conversion option is highlighted, click “Convert” to start the process. If you wish to replace the chosen image, click the “Delete” symbol.
- The conversion takes only a few seconds. Once it is complete, a downloading option will appear on your screen. Click “Download”. After this, it takes a few seconds for you to view your new PNG image in the downloads folder.
- Once you have your PNG images, you can edit them to suit your needs. You can see editing options for resizing, brightening, and more.
- After editing, choose saving options for your image; the file type will appear as .png.

Due to their speed and efficiency, online converters are popular among professional photographers, web developers, and graphic designers.
2. Converting WebP to PNG on Windows
Converting WebP to PNG on Windows is straightforward. Here are a few steps to get your WebP file in PNG.
- Use Microsoft Paint to open the WebP file you want to convert. You can do this by right-clicking the image followed by “Open With” > “Paint”.
- With the file open, click “File”, hover the cursor over “Save As”, then choose “PNG Picture”.
- A dialogue box will open on your screen; select a saving location for your PNG file.
- Finally, click “Save”.
3. Converting WebP to PNG on Mac
Converting image formats on Mac is straightforward with Preview. With only a few clicks, you can convert your WebP image to PNG on a Mac. The key difference between Mac and Windows conversion is that you will use Preview on Mac instead of Paint.
Here is how to go about the process.
- Open the WebP file in Preview. Since Preview is Mac’s default image viewer, you only need to double-click the image.
- Once the WebP image is open, click “Files” > “Export”.
- A dialogue box will open up. Click the drop-down menu in it and choose “Formats” > “PNG”.
- Suppose your WebP has a transparent background; select “Alpha”.
- Select a suitable location for your newly converted PNG and click “Save”.
Conclusion
While WebP excels in efficiency and lossless compression for web images, there are situations where converting to PNG proves necessary. Online converters are the fastest method of changing WebP image files to PNG. You can rest assured that image quality will be retained during conversion.
For users without internet access, alternatives exist on operating systems like Windows and Mac. On Windows, Microsoft Paint facilitates a straightforward conversion, while on Mac, Preview serves as a reliable tool.


Comments (0)
No comment