How to Find Hidden and Missing Files on Your Mac

Are you forced to search through all files on your Mac trying to find a missing one? Or maybe you’re trying to access a file that macOS has hidden by default? Take a breath and spend a few minutes with this article - we’ll show you simple ways to find both hidden and missing files on your Mac. With the methods we cover, no file will stay out of reach for long.
Quick heads-up, though: if you’re dealing with system files, be extra careful once you find them. Apple hides those for a reason - they’re necessary for your Mac to run properly. Deleting or messing with them can cause serious problems, so look, but don’t touch them unless you know exactly what you’re doing.
Quick Solution: Find Files with Spotlight on Mac
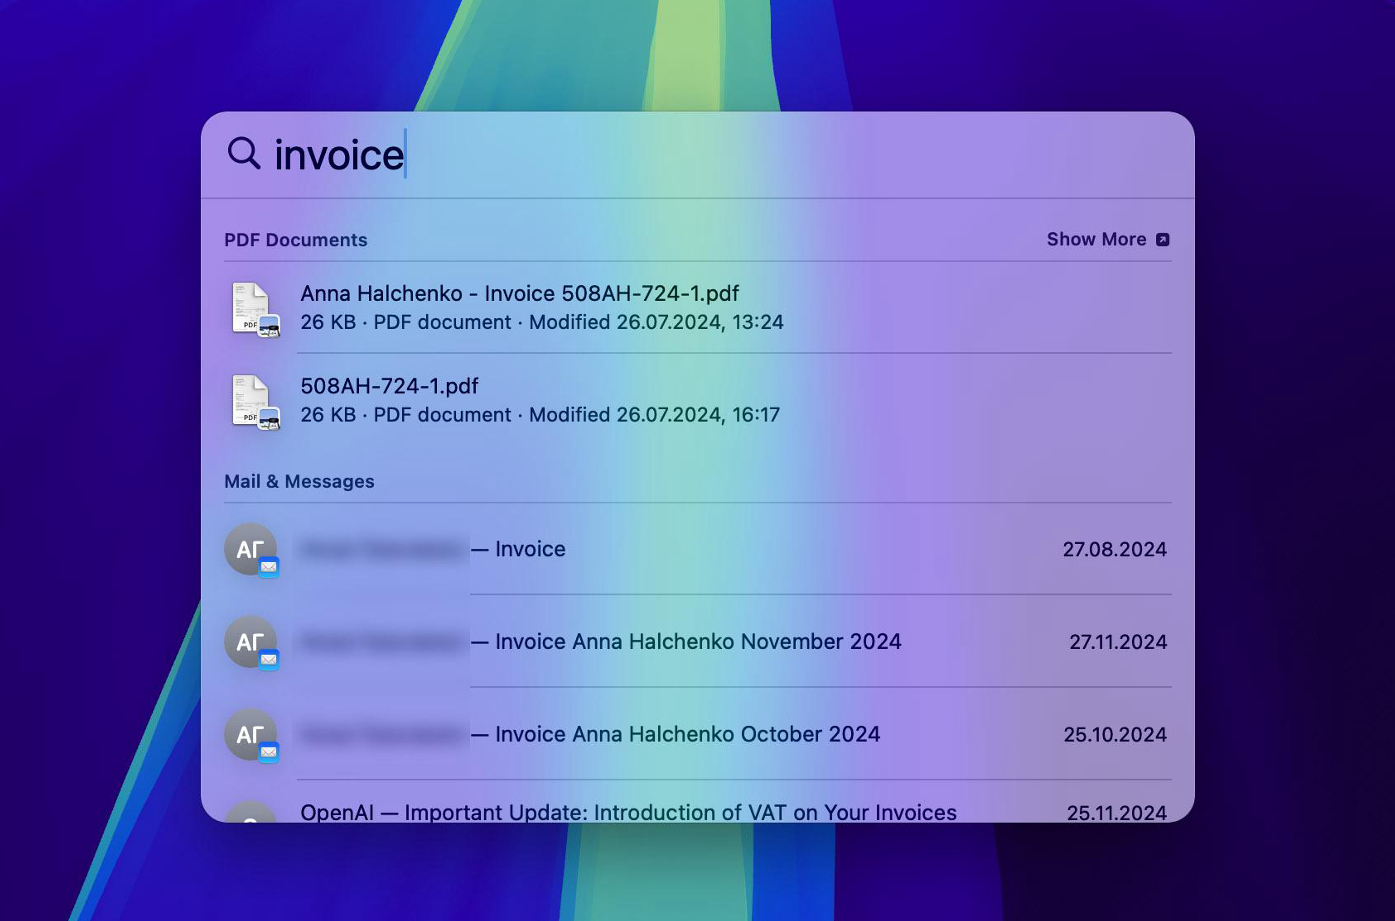
Sometimes, the reason you can’t find a file isn’t because it’s hidden or deleted - it’s just misplaced. Maybe you saved it somewhere unexpected or weren’t paying close attention. In cases like this, Spotlight is your best friend. If you remember the file name or its extension, your search becomes a whole lot easier.
- Press Command + Space to open the Spotlight search bar.
- Type in the file's name or its extension - Spotlight will instantly start showing results that match.
- Use the arrow keys to scroll through the list. When you find the file you’re looking for, press and hold the Command key to find the file location on your Mac or Command + Enter to open it in Finder.
- From there, you can double-click to open it or drag it to your desktop or another folder so it’s easier to find next time.
4 Methods to Find Hidden and Missing Files on Mac
If the quick tip above didn’t help you locate your file, there is still a good chance it’s hidden or missing. Whether it disappeared because of something you did accidentally or for another reason altogether, these files are usually recoverable. Below, we’ll walk through four methods designed for different scenarios and skill levels to track down those elusive files on your Mac.
If you’re sure you deleted the files - not just hid or misplaced them - skip ahead to methods 3 and 4 in this article. That’s where we walk you through how to recover deleted files from your Mac.
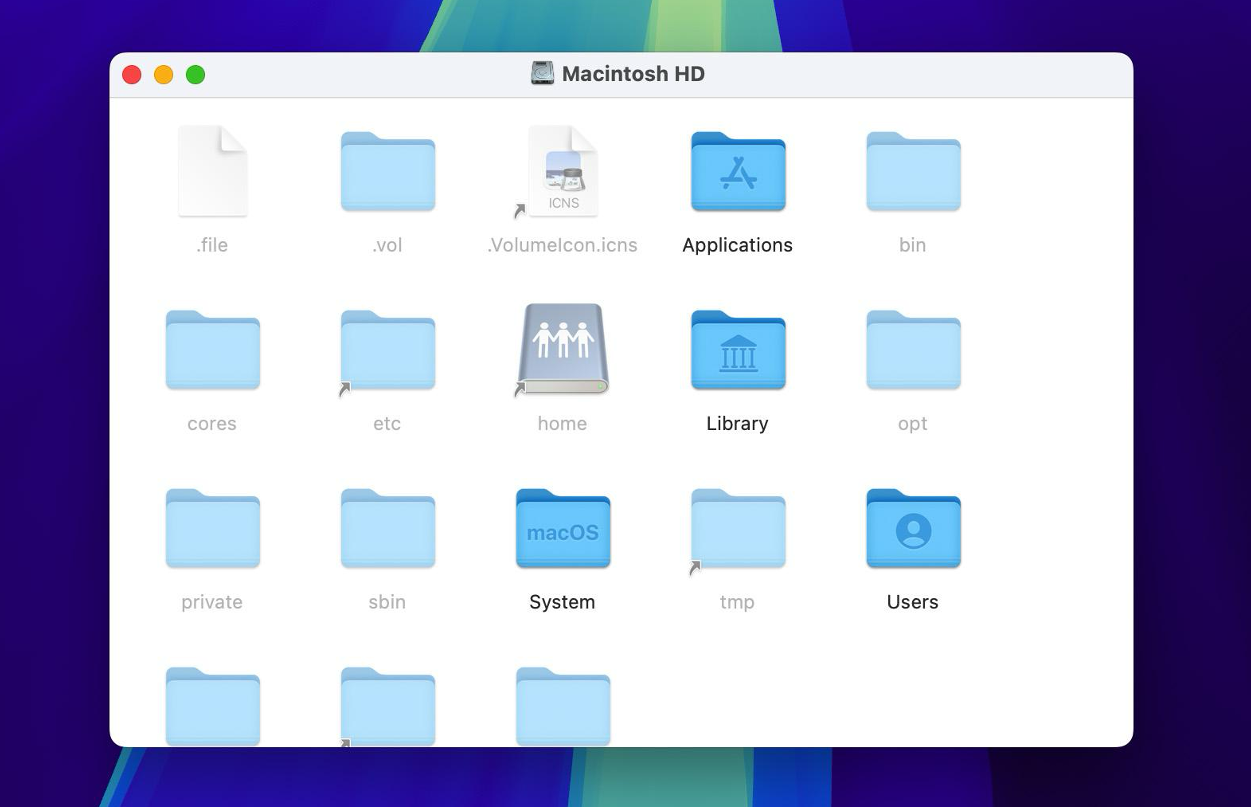
Method 1: Locate Hidden Files with Finder
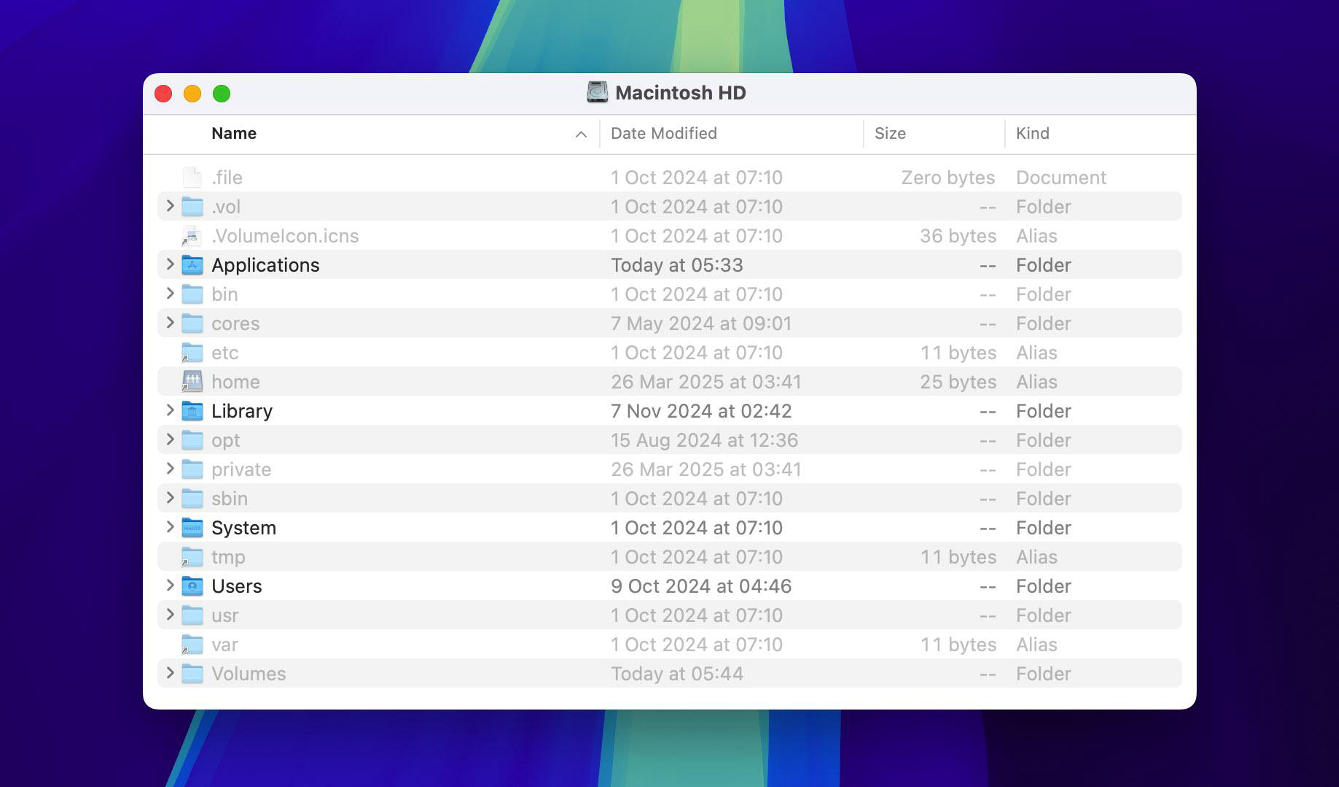
- Click the Finder icon in your Dock to open a window.
- Go to the folder where you think the hidden files might be, or start at the root if you have no idea.
- While in the Finder window, press Command + Shift + . (period). This find command toggles the visibility of hidden files and folders in the current Finder window.
- Now that you are able to view the hidden files, browse, open, or move them as needed. Handle system files and directories with caution because changing them affects your Mac's performance.
- To hide them again, hit Command + Shift + . (period) again.
Method 2: Use Terminal to Find Hidden Files on Mac
You can also use the find command in Terminal to locate hidden files on your Mac. If you’ve never used Terminal before, don’t worry - it’s easier than it sounds. You don’t need to understand every detail; just follow the steps below and copy the commands exactly. (And yes, if you know how to copy and paste, you’re already halfway there!)
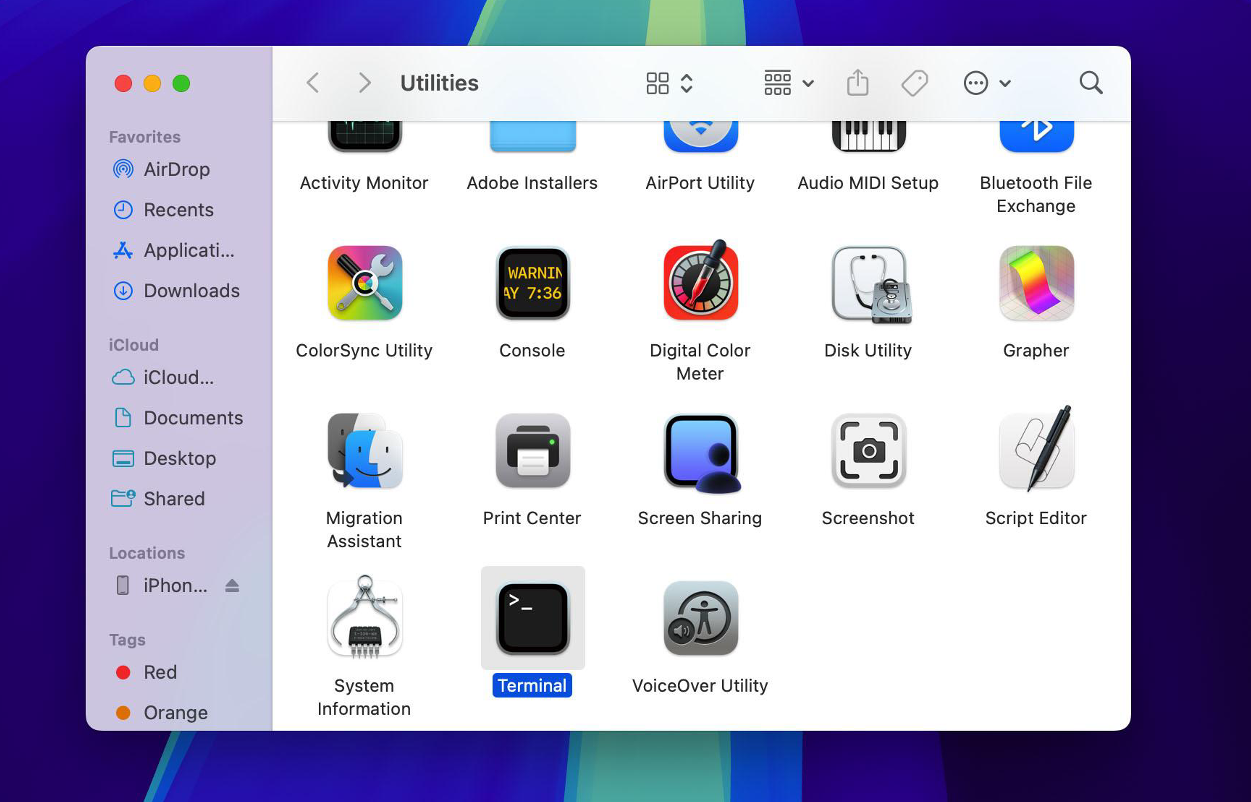
- Open Terminal. You’ll find it in Applications > Utilities, or just search for it using Spotlight.
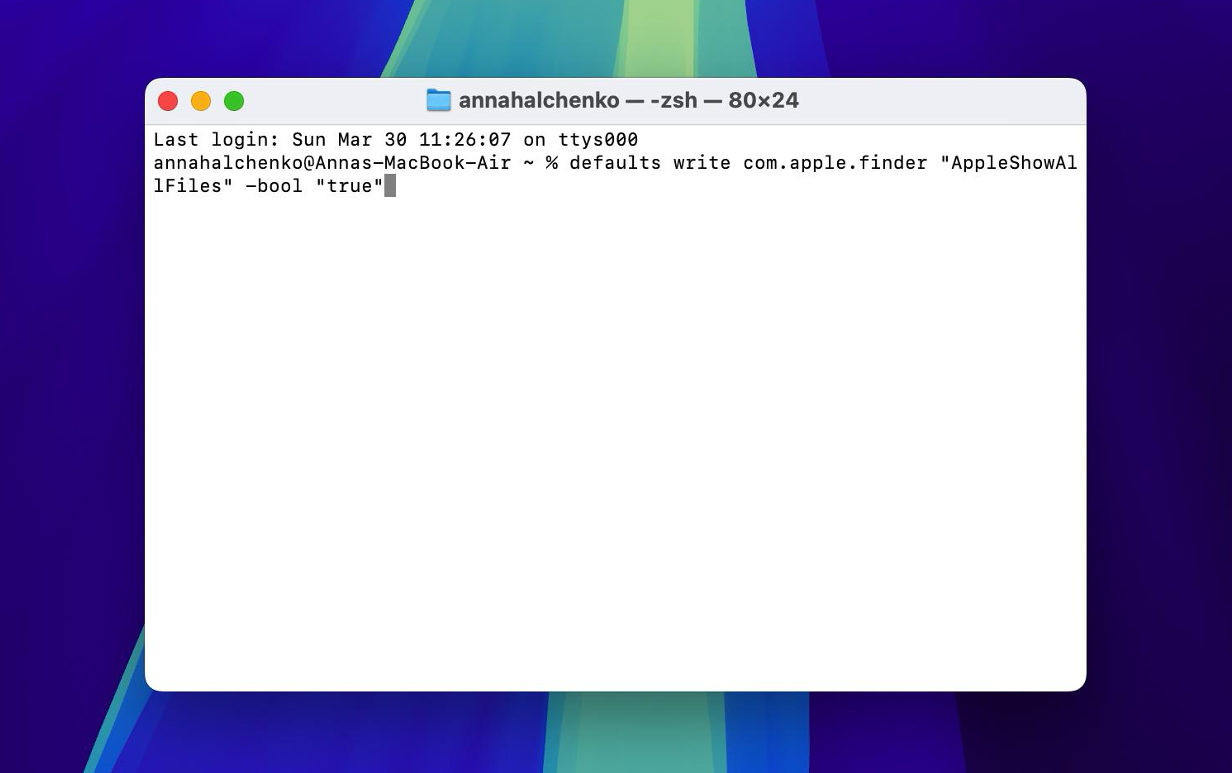
- Use the following command to make all hidden files visible:
defaults write com.apple.finder "AppleShowAllFiles" -bool "true". Highlight the command with your mouse, right-click and select ‘Copy,’ or simply use Command + C. Next, click inside the Terminal window, right-click and select ‘Paste,’ or use Command + V to paste the command. After you paste the command into Terminal, press Return to execute it. This command tells Finder to change its settings to show all hidden files. - For the changes to take effect, you need to restart Finder. You can do this by typing
killall Finderin the Terminal and pressing Return. - That’s it - hidden files and folders should now be visible in Finder. Just be careful not to delete or move anything system-related unless you’re sure it’s safe. If you decide later that you want to hide the files again, use the same command with false instead of true and restart Finder again with
killall Finder.
Method 3: Check Your Mac Trash
If the Finder shortcut and Mac Terminal command didn’t help you find your file, there’s a chance it was deleted. Sure you didn’t delete it? Either way, the first place you should check is the Trash - it’s the easiest spot to recover files from.
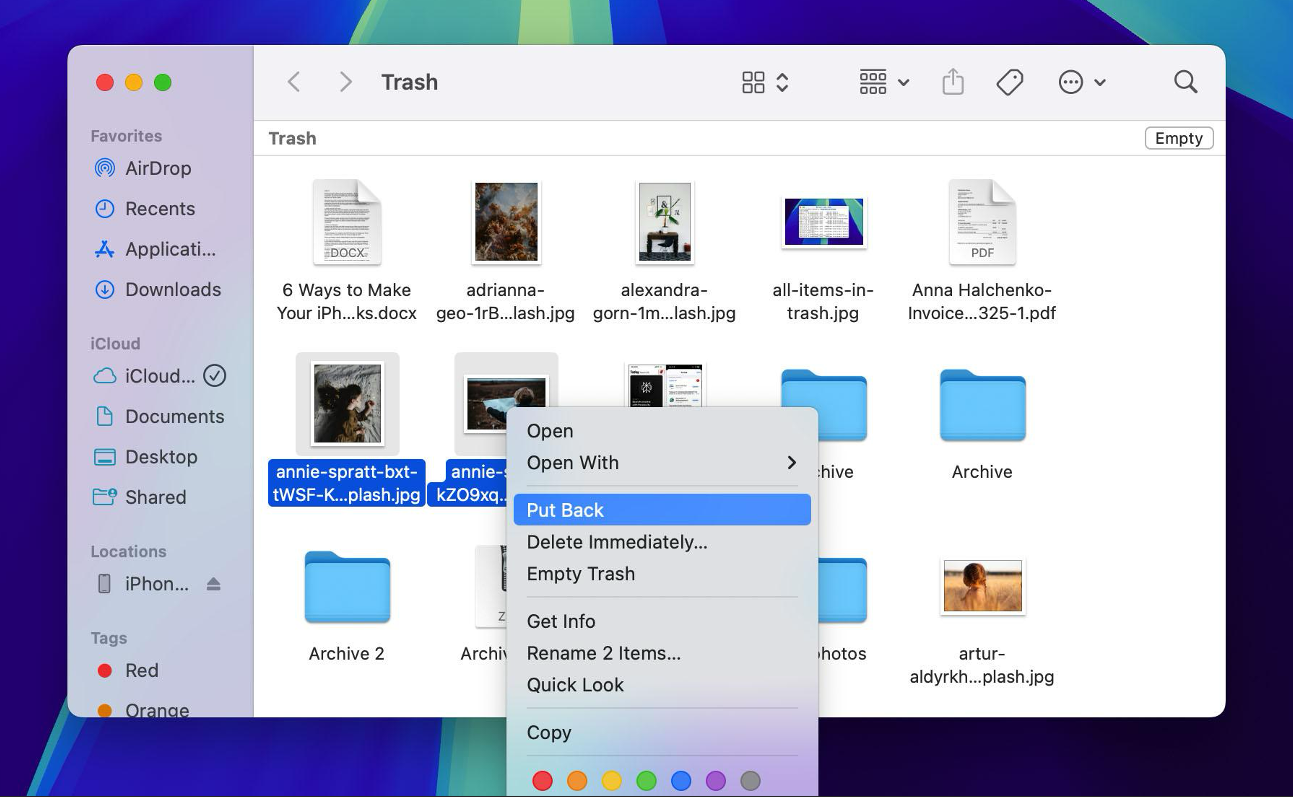
- Click the Trash icon in your Dock to open it. You’ll see everything you’ve recently deleted.
- Scroll through the list or use the search bar in the top-right corner to find the file you’re looking for.
- Once you find it, right-click the file and select Put Back - this sends the file back to the folder it came from.
- You can then head to that original location to double-check that the file’s been restored.

Method 4: Restore Missing Files Using Specialized Tools
If you’ve tried all the previous methods and still can’t access your missing files, they’re likely permanently deleted. There’s still a chance to get them back using data recovery software, especially if you act quickly.
For this article, we’re using Disk Drill as an example. Why this one? First, it consistently appears in top-rated lists of file recovery tools for macOS, and we’ve looked through many of them. Second, it’s powerful. It can recover everything from deleted personal files to hidden system files, including photos, videos, presentations, and documents, you name it. The catch? You can download and scan for free and even preview what’s recoverable, but you’ll need to upgrade to the Pro version to actually restore the files. Still, it’s a solid tool and a good bet if you’re serious about recovering your data.
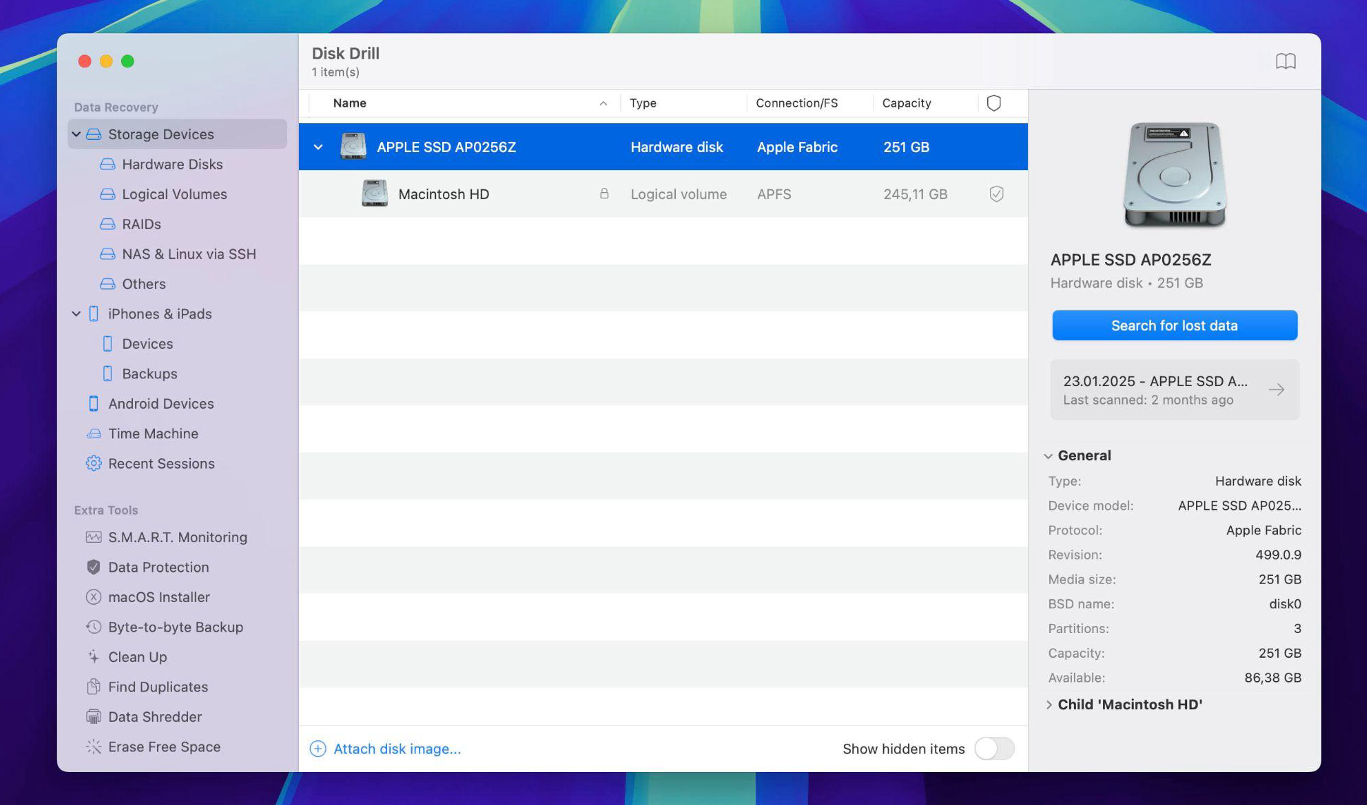
- Visit the official website of Disk Drill and download the macOS version. Follow the installation instructions to set up the software on your Mac.
- Once it’s installed, open Disk Drill. You’ll see a list of all available disks and partitions. Pick the one you want to recover files from and click “Search for lost data” to start the scan.
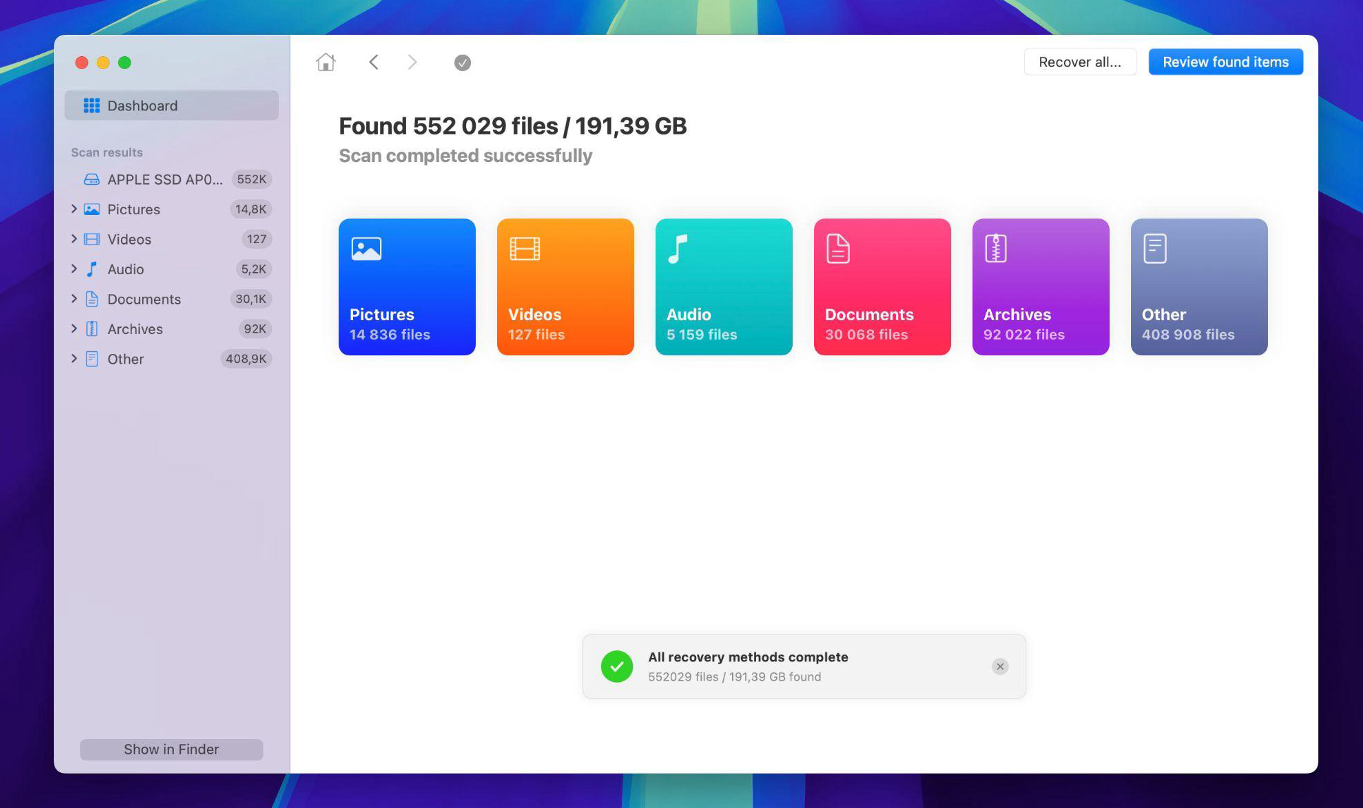
- When the scan finishes, click “Review found items.”
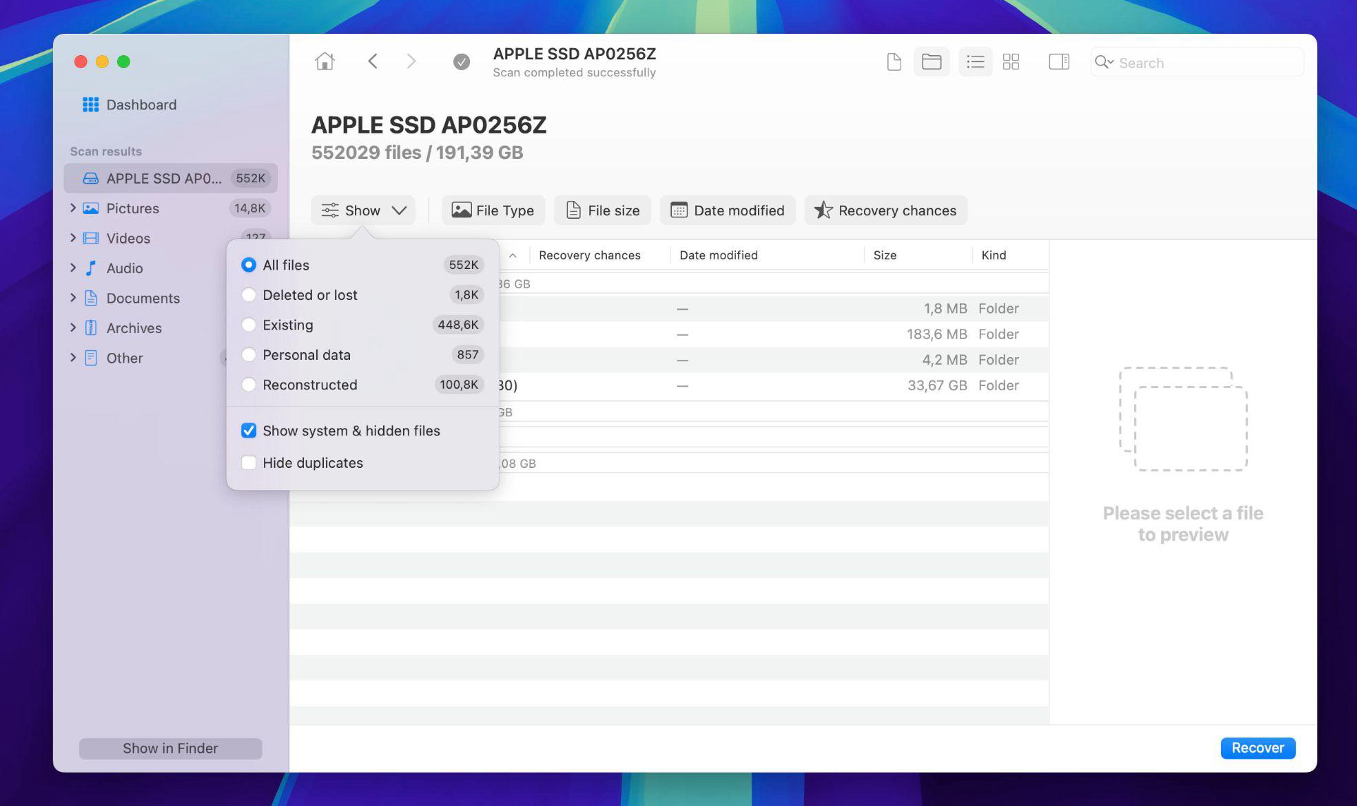
- At the top of the results, hit “Show” and select “Show system & hidden files.” This will display everything, including hidden and system files, right inside the software.
- The files will be grouped into categories like Existing files, which are still on your system but might be hidden; Deleted or lost files, which have been removed but are still recoverable; and Reconstructed files, which have been pieced together from fragments that were found during the scan.
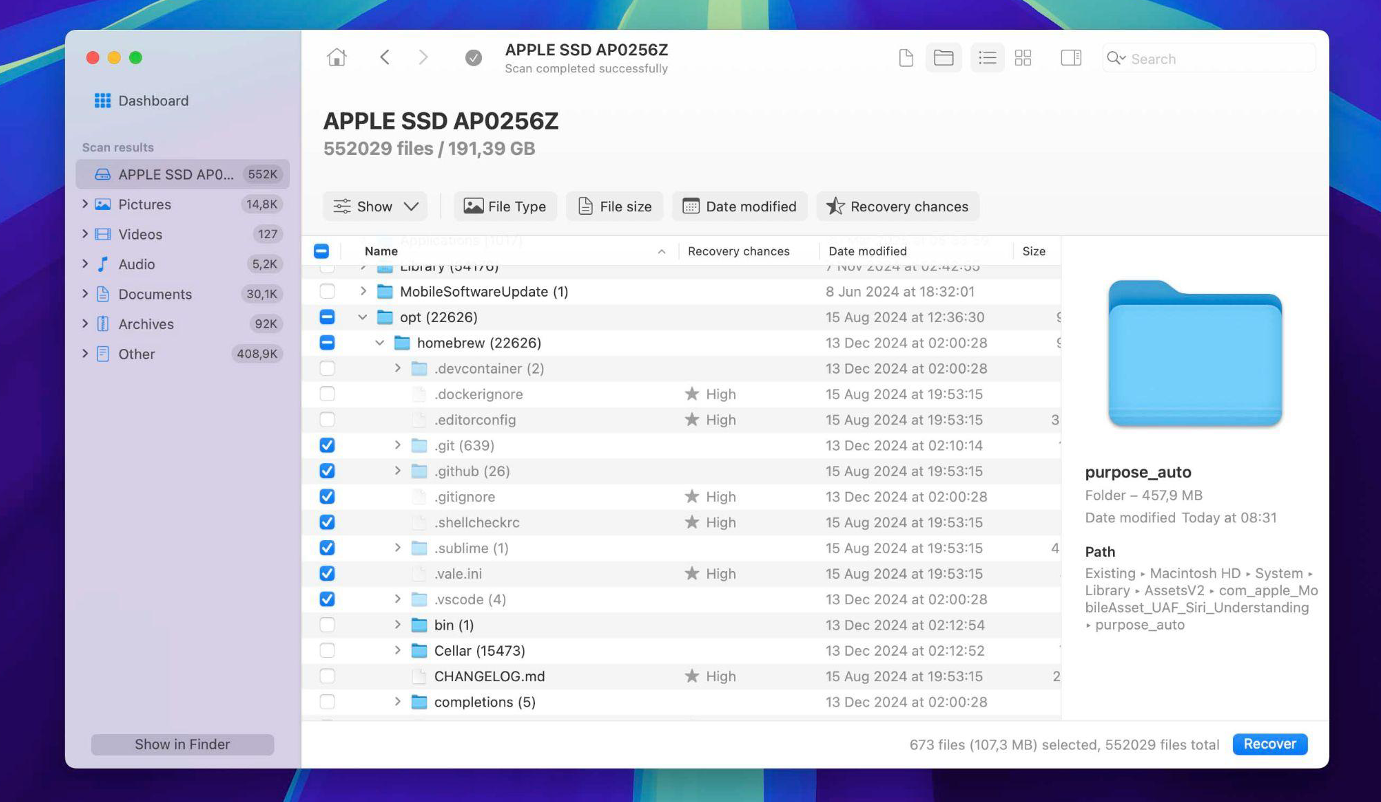
- Check the boxes next to the files you wish to recover and press the "Recover" button.
- Then, choose a safe location to save the recovered files. Confirm by pressing "Next." In just a few minutes, the software will recover all the files you selected - and that’s it, you’re all set.

Conclusion
Now you know how to locate hidden and missing files on your Mac. We’ve covered just about every scenario, whether you simply misplaced a file or accidentally deleted it, so you should be able to find a solution that fits your situation.
If you’re sure you didn’t delete the file or you’re looking for a hidden system file, don’t jump straight to recovery tools. Start with methods 1 through 3, depending on your case, and carefully check each folder.
If there’s even a chance you might’ve deleted it, check the Trash right away. If it’s not there, move quickly and use data recovery software before that file gets overwritten because once that happens, recovery is basically impossible. And if it turns out that file was something your Mac needs to run correctly, the fallout could be serious.
Comments
Comments are moderated to keep the discussion useful and respectful. Spam, automated submissions, and low-value promotional comments are removed. Comments with outbound links may be approved when the link is relevant to the article and genuinely helpful to readers.
No comments have been published yet.